Kitchen – Day 8

Seriously! You’re still at it? I thought you were done? I can hear you wondering πŸ˜‰

Well, yeah! I am actually done πŸ™‚ For those of you that think this job have taken forever (which it did), day 8 was actually Monday this week. There was just a few days I was too tired to even write about the days work, that it’s taken me a few extra days to get it all out here on the blog πŸ˜‰

Day 8 – clean up day!

The last day of kitchen work was pretty much dedicated to getting the last bits and pieces in order.

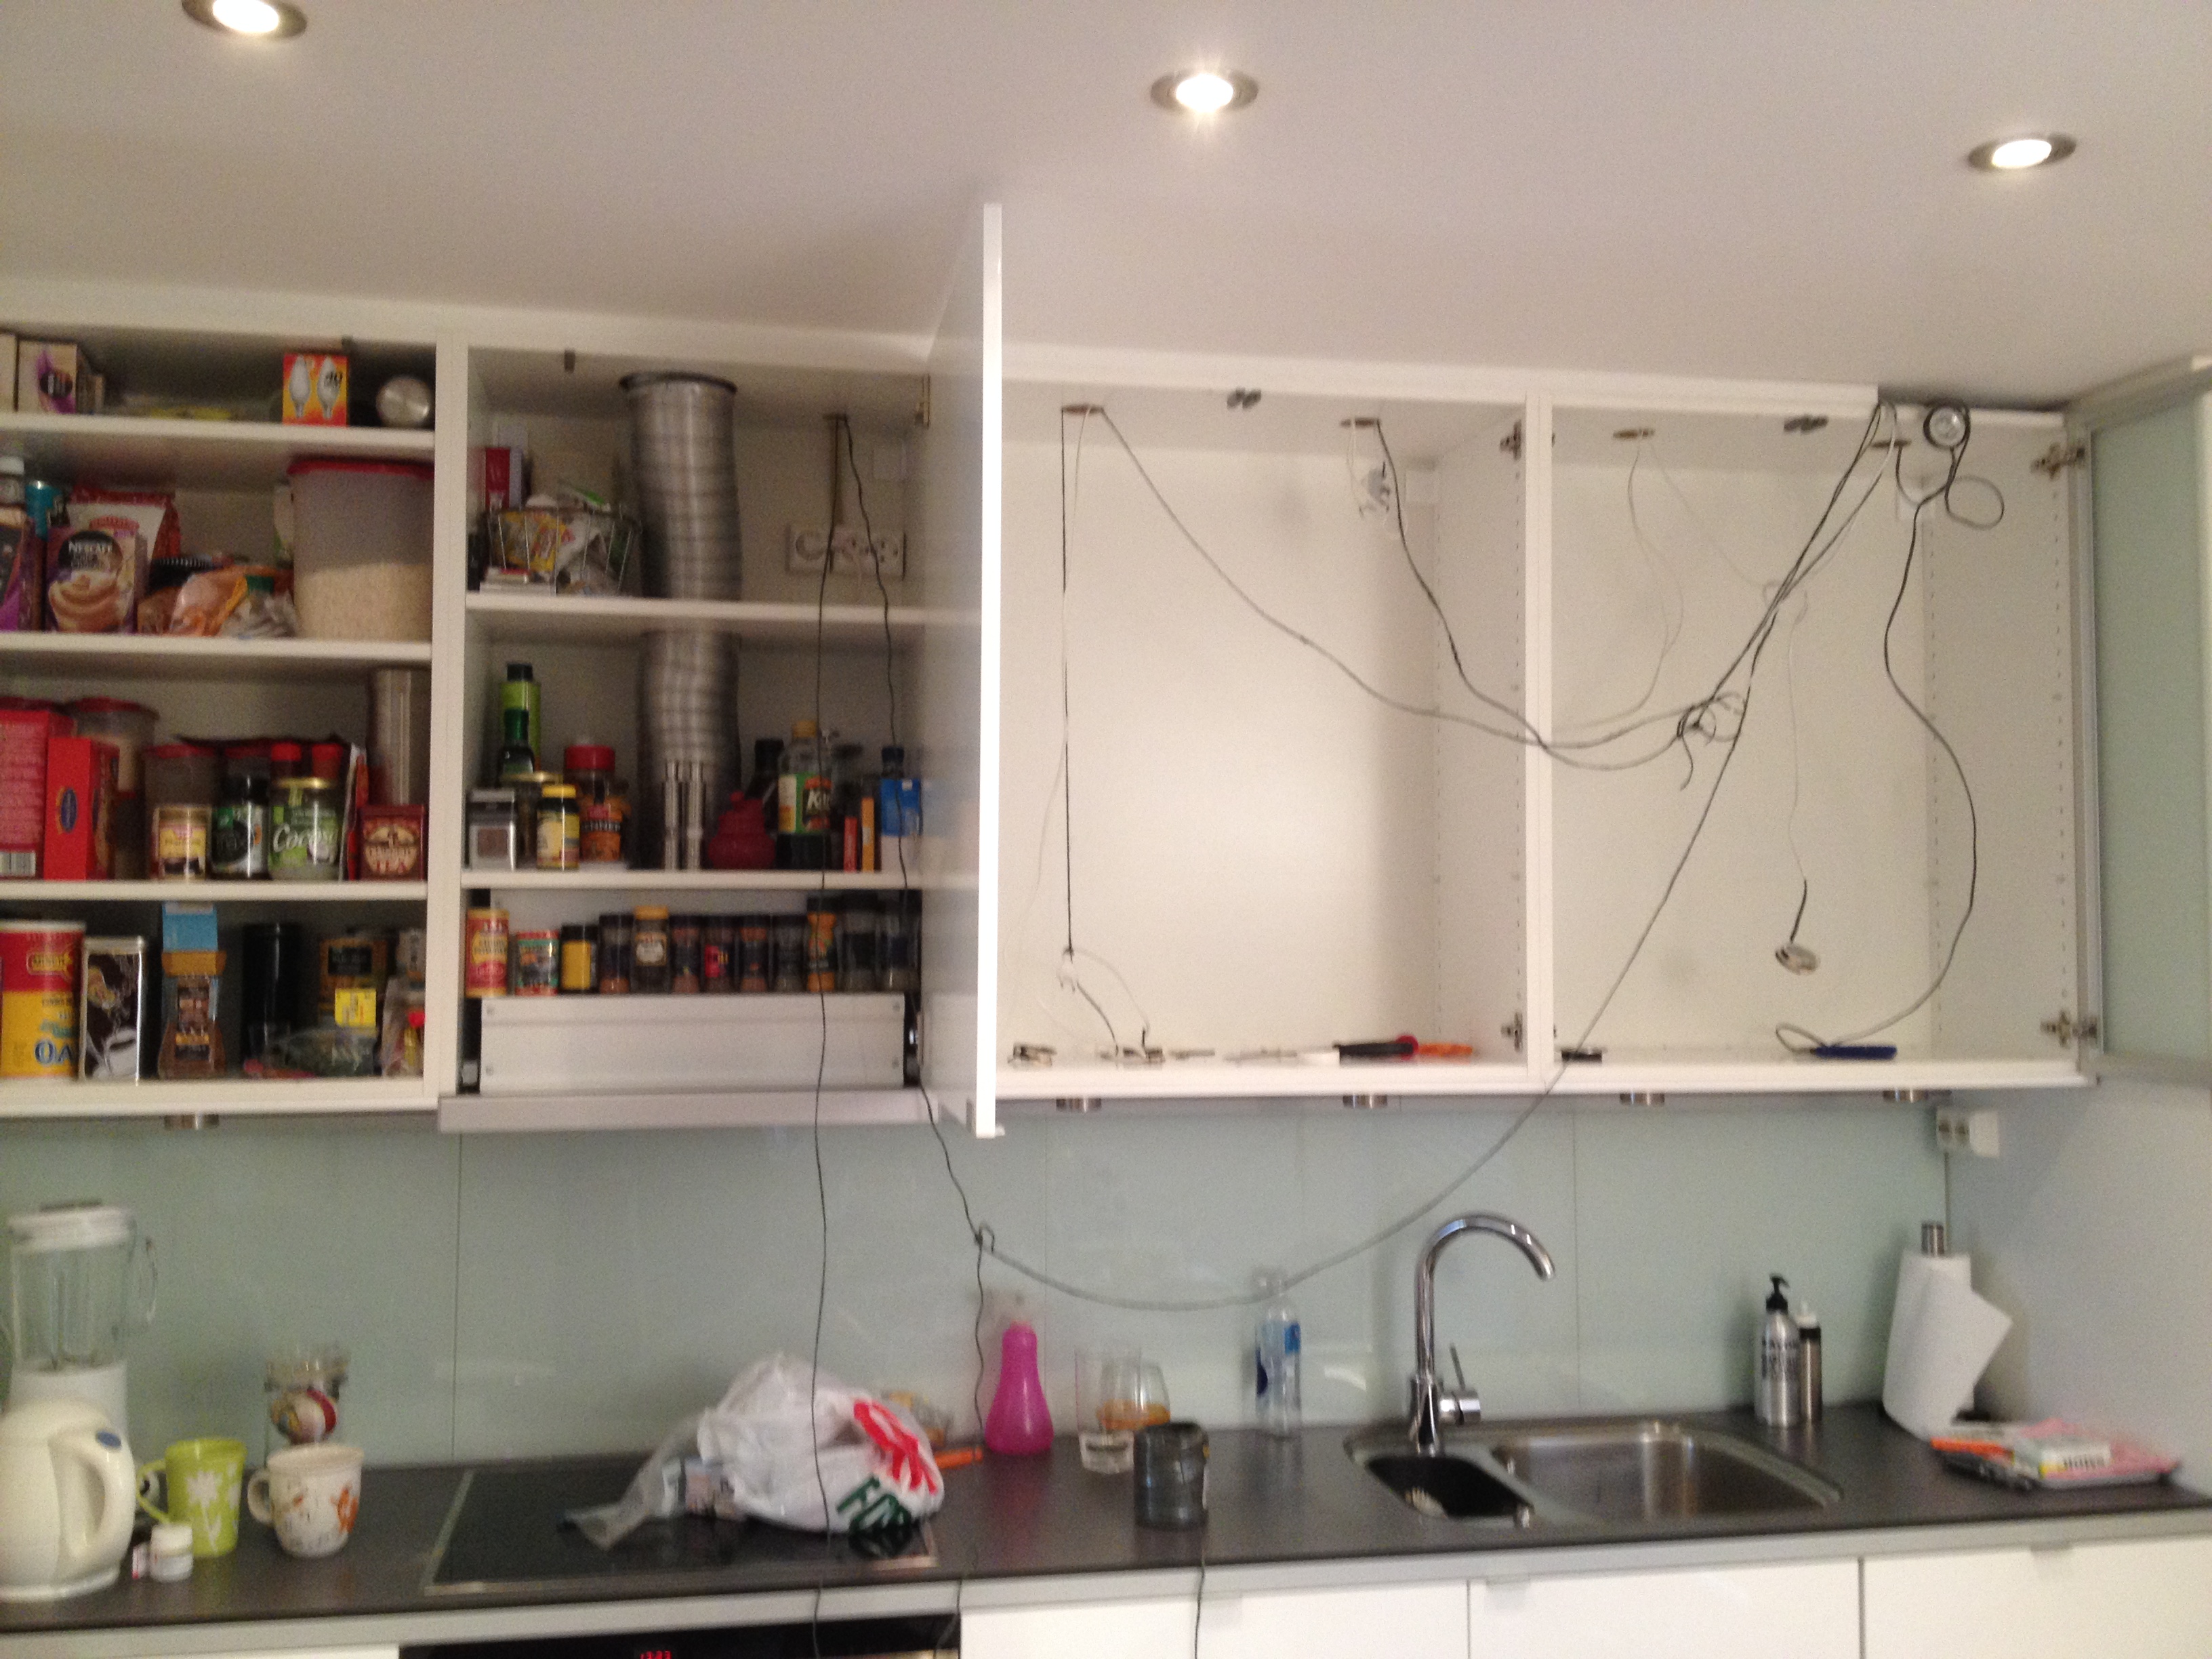
I decided that since I was going to do all this work on the kitchen, I might as well do the yearly cleaning of the kitchen at the same time. You know, that job where you empty everything in your drawers and cabinets, and wash the units and the stuff in the unit.

After using the grinder on the kitchen counter, there really wasn’t much choice in the matter. There was this fine layer of laminate dust on the shelves in my upper cabinets, so I just went ahead and washed them down, and put the glasses and plates through a quick cycle in the washing machine (some got washed by hand). And at the same time did all my other kitchen shelves and drawers. It’s nice to get a completely clean kitchen and knowing that everything inside the cabinets are all neat as well. Christmas cleaning – check πŸ˜‰

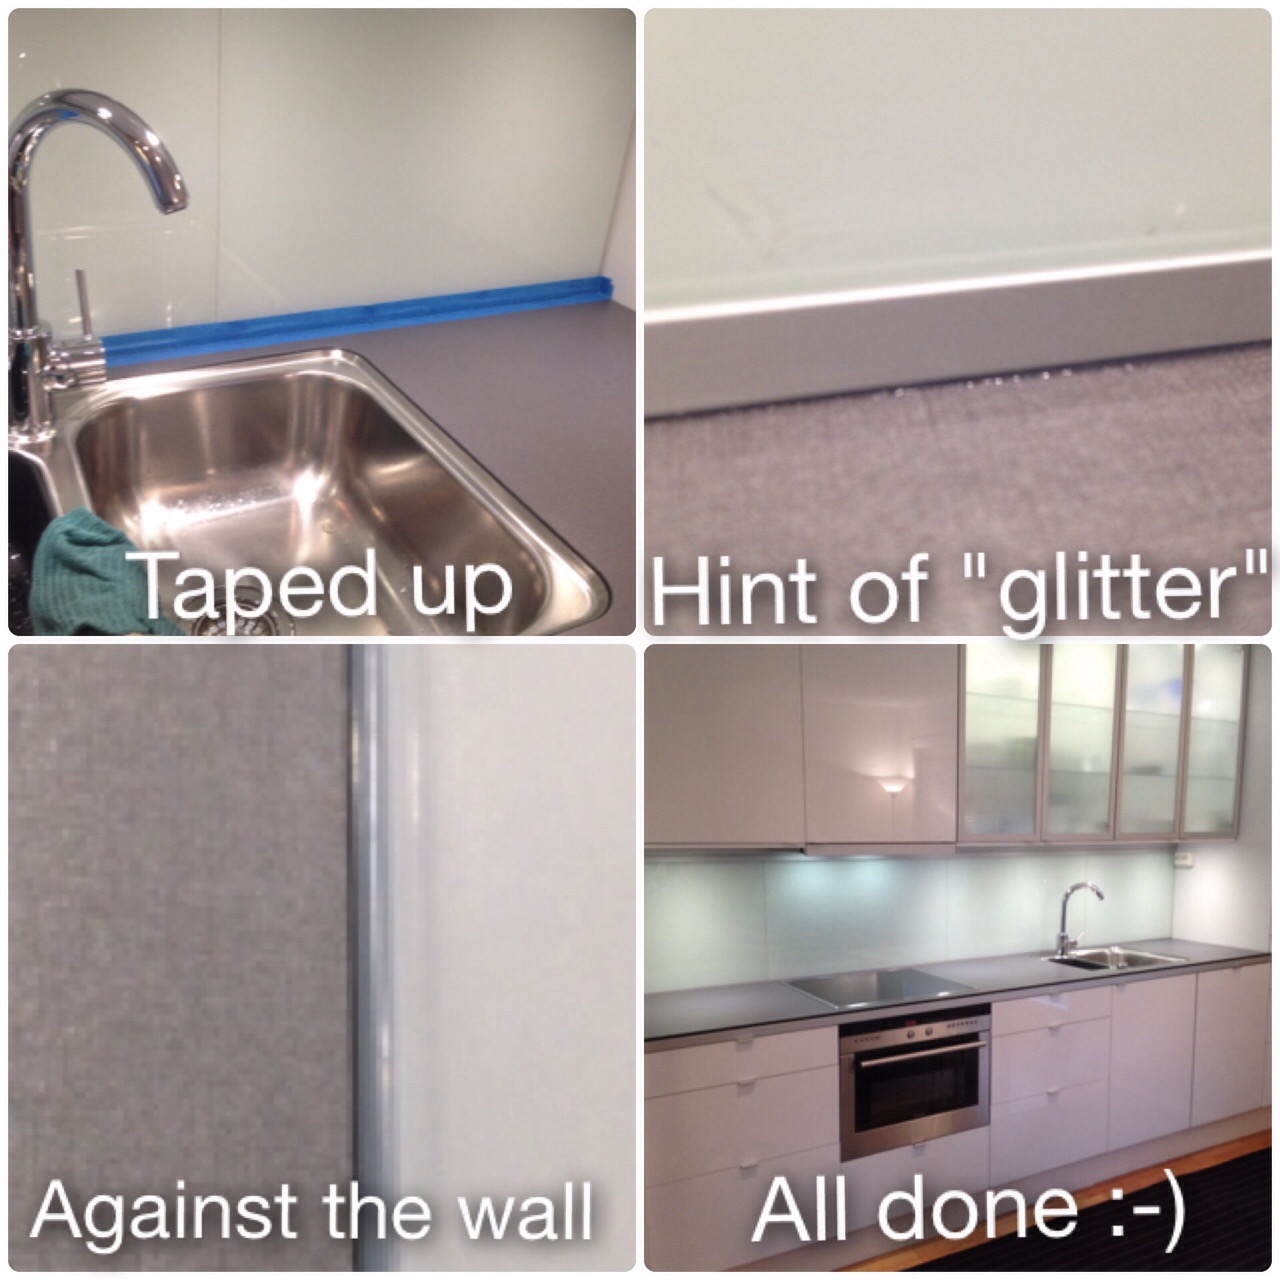
After everything was nicely put away and I had my kitchen back, it was time for that last crucial detail that needed to be done. Caulking (with silicone) around the countertop to make sure no water could go were it shouldn’t go.

Since the crack between the countetop and the backsplash, was barely there, I decided to use blue tape to help me out. I taped the kitchen counter and taped the backsplash, so only the crack to put the clear silicone sealant in, would be open. This helped a lot in being able to push silicone into the crack without being worried about getting any mess on the countertop or backsplash. Β If I may say so myself, the end result is really nice. You can’t really see that there is any silicone there except for a little bit of glitter when the light hits right.

I used the same idea when putting in the silicone between the wall and countertop, and side cabinet and countertop. It gave me the opportunity to really mash as much as I wanted into the crack without making any mess whatsoever πŸ˜‰

One final wipe of the kitchen counter, and that concludes the kitchen project 2014.

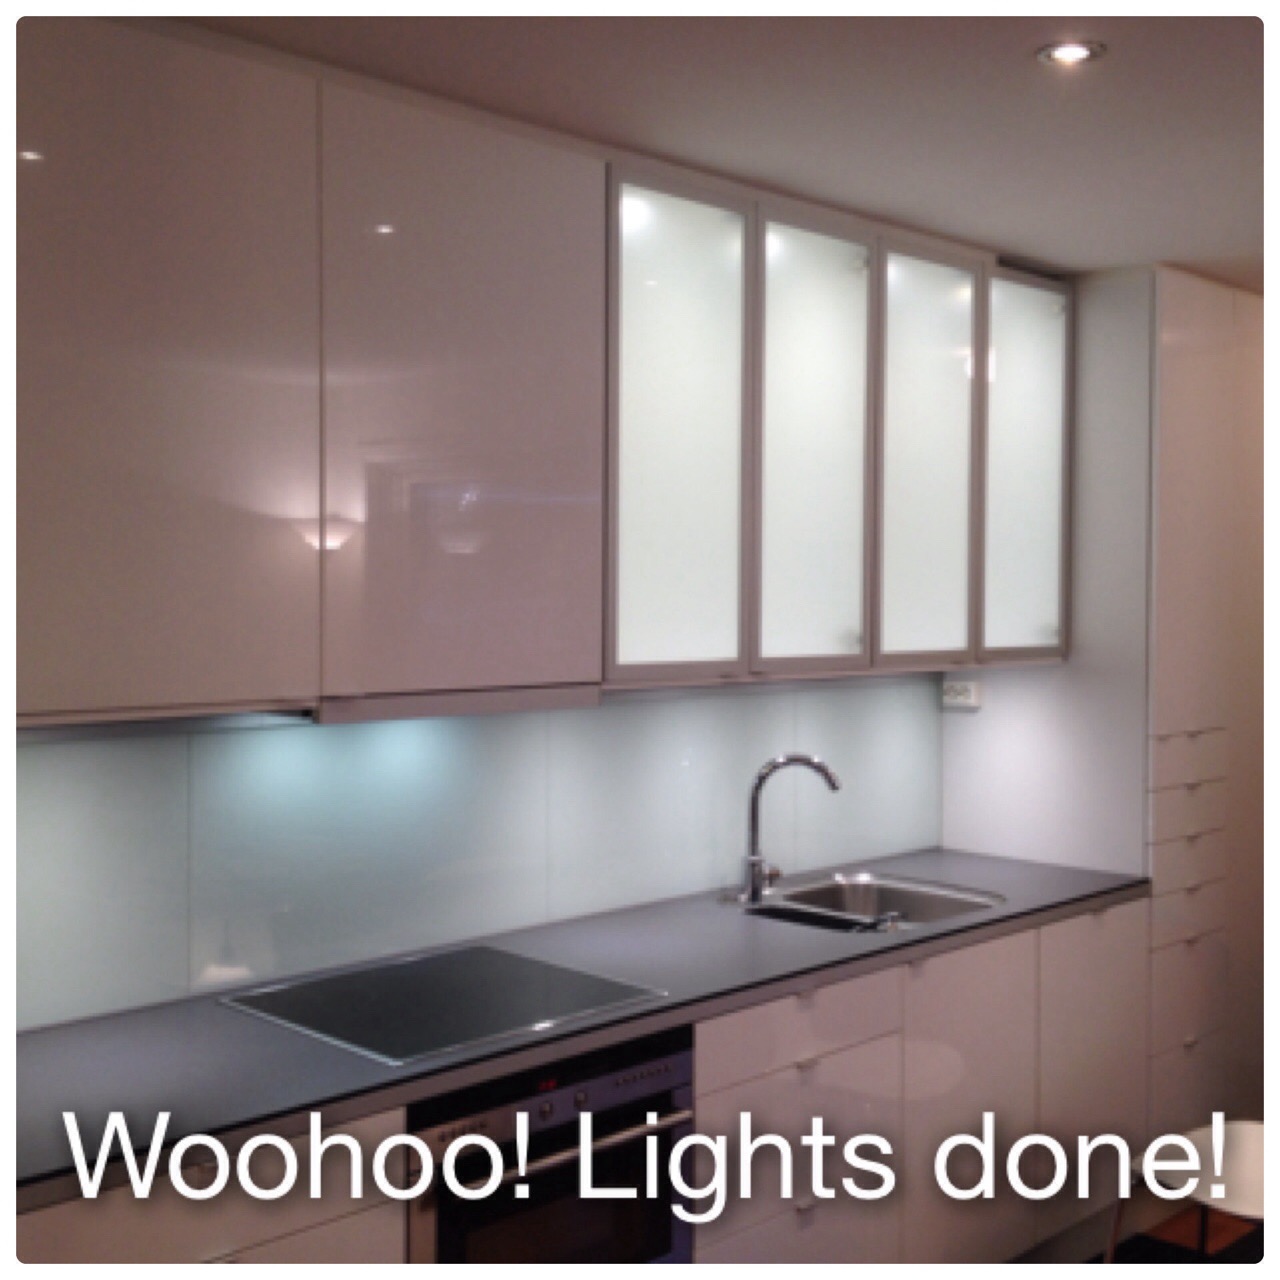
I have to admit, it’s been a lot of work, just to have your kitchen end up looking exactly like before. But at least now I have a functioning sink + LED light instead of halogen lights, so if nothing else, my electric bill should hopefully be better πŸ˜‰

2014-11-06 13.49.57


Kitchen – Day 2

OK – we are still working on the lights, countertop light this time. You know, the one’s that are mounted under the upper cabinets! I have 5 of those.

First day with lights was a bit fiddly because I didn’t have a lot of space to work with. This job, plenty of space, but more work.

When we installed the kitchen originally, we used some cover panels underneath the cabinets, to make everything look nice. It also gave us the opportunity to hide the wires for the under cabinet lighting.

This time around I decided to recess the new lights into the cover plates. I figured it would be a much nicer look, than putting them on the outside, like the old one was. Since these lights have their own wiring system, we needed to get a little creative for how to hide the wires. and we decided to make an individual “groove” in the panels for each wire. Off course I completely forgot to take a photo during this process? Even though you can see what I’m talking about, on the first photo, on the second photo collage.

Pulling down the cover plates with the old lights, was easy enough, just unscrew, cut the wires and the panels was off.

Removing the old lights, easy peasy! Installing new ones? Not quite so much, but I guess that’s always what happens. It’s easy to tear down, not so easy to “build up”.

Fortunately I have pretty good tools, and as we know good tools are half the work. That all worked really well, until we tried to drill the holes for the lamps. Turned out my 56mm cutting tool, just didn’t want to corporate 😦

So what is a girl to do? Well the only solution was to buy a new one, and since we had to pack up to leave the house any-ways, this was a perfect time to do lunch πŸ™‚

Back home again, I have to admit, it almost took longer to get the tools out, than to drill the 5 holes for the lamps.

Lamps installed (using screws, not clips πŸ˜‰ ), wires installed in their “groves” (with a little help of tape to keep the wires in place), and we were ready for first panel/plate to go back up. This one only had one light so easy. Second plate, with two lights, just as easy, now the final and last plate, turned out to be the one to give us trouble! Mostly, due to the fact that the wires from the second plate, continued in “groves/channels” in the third plate… Crap! Fiddly stuff again 😦

We attacked the third plate, got the wires in place, pulled nicely at them to straighten as we “feed” the third plate closer and closer to the second. Screwed it all in place…. and is was crocked at the back, a wire had caught! Down again and start over! Second time around we had it down to a fine art, and within 20 minutes it was done.

Connected all the wires to the transformer, turned it on. Woohoo, it works!

Lights done!

Now if the rest would just be this easy (even though it took us all day) πŸ˜‰


2014-10-25 20.08.542014-10-25 20.14.562014-10-25 20.16.17

Kitchen – Day 1

We decided to tackle the lighting first! But we are doing it in two steps Β – no reason to rush into this right πŸ˜‰

First up was the 4 lights, that are inside the glass door cabinets.

It turned out to be a fiddly process. As you can see from the picture below, there wasn’t much room to work with. I tried to remove the very thin sliver between my cabinets and ceiling, but my dad (when installing this) have obviously just about “velcroed” it together with acrylic, and I almost broke it trying to remove 😦

So I promptly had to give up on that! Which left me we only the small holes the old lamps was in, and the not even 2 fingers high sliver of an opening on top, to navigate all the wires/cables/transformers. As you can see from the picture, I ended up using a lot of rope (I figured this would be the only way I could pull the new wires).

Removing the old stuff was a pain. I have to admit my dad had done a good job installing everything, when we put the kitchen together originally, but removing the stuff!!! Seriously finger twisting work πŸ˜‰

Installing the new stuff on the other hand, went like a breeze Β – probably had something to do with all that rope already in place πŸ˜‰

It looks really good, but I’ve come to realise one small mistake. Installing the lights, you could either fasten them with small screws or a clip, I used the clip (it was easy), but have realised that if I ever need to change them out later, I will have to “break” the rim of the lights, to pushΒ them through the cabinet, as the spring loaded clip won’t let me remove them the right way. In hindsight, I should have tried to use the screws or a small dollop of acrylic to fasten them. That would have made any potential future removal easier.

Hopefully I won’t ever have any issues with these, and since they are of a type where it is possible to change the led lights without changing out the whole lamp, there is hope I will never have to change the lamps again!Β I just figured I’d give you a heads up, if you are ever installing upper cabinet lighting, and have less to no space to work with (like me), my recommendation is to not use the clips, if they won’t let you remove the lamp the same way it goes in.

Any-ways! At least I realised this before my next 5 lights πŸ˜‰

During and Done
2014-10-24 17.28.262014-10-24 19.08.40

Kitchen work – DIY

It’s seem like I’m working on a “thousand” small projects these days. I’ll tell you all about them, but right now I want to let you in on one of the “bigger” ones.

I have a reasonable new house (2006) and there is no reason why this should have happened at all, but a few months ago (July I think) my kitchen sink, an under-mount stainless steel sink, suddenly came loose from the kitchen counter!!! Not a fun moment, believe me!

Well that didn’t make sense to me that an expensive under-mounted sink suddenly should come loose after only a few years. So I went down to the kitchen store and complained. It seems like the people I ordered my kitchen countertop from, thought the same.

There is no way to fix the under-mounted sink in it’s place, they told me this has to be done at the factory. So they decided to give me a new countertop and sink, even though it was outside of warranty. Which I have to say, was nice of them! Now, installation on the other hand, not included…

Fast forward to late September and I picked up my new kitchen counter. Which is currently laying on my living room floor πŸ™‚

It’s time to tackle the kitchen project, so over the next few days a friend of mine have dedicated some time to help me out.

While working on the kitchen any ways, I figured this is a good time as ever, to fix some issues I’ve had with one of my under cabinet spotlights, that never really would work. So I’ve decided to go ahead and swap all my cabinet lights, over to new LED lights. Just to really give us some work πŸ˜‰

As you know, my kitchen ain’t big, so swapping things out, pretty much means tearing the kitchen “apart”. Groan!!

I figured I might as well let you in on the chaos in my house, so I’ll be posting as we move along.

Wish us luck, will ya! Β πŸ™‚

Kitchen before “hell” broke loose, and new kitchen counter on the floor.
2014-03-01 11.44.00 2014-10-25 08.57.56